Installation
Server Requirements
UserFrosting makes a few assumptions about what you've got going on under the hood. We're working hard to ensure interoperability with as many different server and operating system technologies as possible. But, please realize that there are hundreds of possible web server technologies out there, with millions of different default configurations. We cannot possibly test them all, and we ask that you be patient if something goes wrong when you're first getting started. Check the troubleshooting guide first, then submit a detailed bug report with specific information about your server configuration and the error.
The "gold standard" environment for successfully running UserFrosting is on Mac OSX with XAMPP installed.
However in general, UserFrosting should behave nicely if you have:
- An Apache server with the
mod_rewritemodule installed and enabled. - PHP version 5.4 or higher.
- MySQL server version 4.1.3, with PDO database connections enabled.
Other things to consider:
Local Development Environment
Think about this for a second: how do you test your code as you are writing it?
If your answer is, "I write it in (insert name of text editor here), upload it to my hosting account, and then view the page," then you deserve to have your face smeared with honey and buried neck-deep next to an anthill. Haha, just kidding. But seriously, your life will be so much better if you always develop and test your code locally before you upload it to your hosting server.
It takes about 5 minutes to install and configure a full-stack development server (Apache+PHP+MySQL) on your computer, and it will make your life so much better. You won't have to worry about accidentally exposing sensitive information (passwords, accounts, etc) on the public web, and you won't have to spend time uploading your files each time you want to test a new line of code. I prefer XAMPP.
URL Rewriting
UserFrosting relies on URL rewriting, which allows us to have URLs that/look/like/this instead of looking/like_this.php. In Apache, this is handled by the mod_rewrite module. Unfortunately, even today in {{ site.time | date: '%Y' }}, there are still many web servers that do not have this module enabled or properly configured. If UserFrosting isn't working with your GoDaddy or Jimbo's Ostrich Farm and Web Hosting shared hosting account, chances are that the problem can be tracked down to an issue with URL rewriting.
nginx
We do not yet "officially" support nginx, but we hope to soon. In the mean time, you can try the suggested nginx configuration file for Slim (which UserFrosting is built on).
Other Development Tools
Composer
When you're ready to start adding your own code to UserFrosting, you'll need to install Composer, the de facto standard for dependency management in PHP. Composer makes it easy to include other PHP libraries in your code, and is responsible for autoloading all of the files in UserFrosting (which is why you don't see a ton of nasty require_once statements everywhere). Install it once, use it for everything.
A Good Text Editor
I use KomodoEdit. Use whatever you want, just please spend time finding a text editor that works well for you. Don't just use whatever happens to be the default editor that came installed on your computer.
Willingness to Learn
Ok, I get it, you don't want to be a professional PHP developer. You just want your thing to work. Fine. But there is are reasons why professional PHP developers do what they do, reasons that are in the best interest of hobbyists and pros alike. If you plan on using PHP to build a web application that is secure and maintainable, please, for the love of God, take an hour to browse through PHP The Right Way.
Stimulant(s) of Your Choice
I'm a coffee guy, but some people prefer tea, yerba mate, or crack cocaine. Just don't smoke tobacco, ok?
Installation
UserFrosting comes with a built-in installer, which sets up the initial data tables and master account. One thing the installer cannot do is configure your server for you. So, you will need to follow these steps:
Step 1: If you're using Apache
Step 1a: Check that mod_rewrite is installed and enabled
Open your console (command line) and run sudo a2enmod rewrite This command stands for "Apache 2 enable module".
If you get an error stating rewrite module is not found, then your userdir module is probably not enabled. To enable it, run sudo a2enmod userdir, then try again to enable rewrite.
Step 1b: Configure AllowOverride All
Find your main Apache configuration file.
- In Ubuntu, this is usually located at
/etc/apache2/apache2.conf. - In Debian/Raspbian, this will be your
000-default.conffile. - In most other systems, this is your
httpd.conffile.
Find the block that looks like:
<Directory /blah/blah/blah/>
    Options Indexes FollowSymLinks
    AllowOverride None
    Require all granted
</Directory>
where blah/blah/blah is the public directory into which UserFrosting is being installed. There may be several blocks like this, so make sure you find the one for your installation directory! In this block, change AllowOverride None to AllowOverride All.
Step 1c: Restart Apache
Run service apache2 restart.
Step 2: Download UserFrosting
Download the latest version of UserFrosting, unzip/untar it, and place it in your document root. The two directories that you need to worry about are public and userfrosting.
On a production server, you may wish to put the contents of public directly into the top-level public directory of your web hosting account, and put the userfrosting directory at the same level as the public directory. For example, if you FTP into your hosting account:
/                 // The root directory of your hosting account
|-- etc
|-- logs
|-- public_html      // Put the contents of 'public' in here
|   |
|   |-- css
|   |-- images
|   |-- js
|   |-- .htaccess
|   |-- index.php
|
|-- userfrosting    // Put the contents of 'userfrosting' in here
|   |-- auth
|   |-- controllers
|   |-- locale
|   |-- models
|   |-- plugins
|   |-- schema
|   |-- templates
|   |-- vendor
|   |-- composer.json
|   |-- composer.lock
|   |-- config-userfrosting.php
|   |-- initialize.php
Step 2b (Apache users only): The .htaccess file
Apache uses the .htaccess file in public/ to correctly interpret the URLs that make up your site. When you copy the UserFrosting files, make sure that you copy the .htaccess file as well! In OSX, files that begin with . are hidden by default, so you need to make them visible!
You should also check that the permissions for .htaccess are set to 644.
In OSX and BSD:
stat -f "%OLp" public/.htaccess
In Linux:
stat --format '%a' public/.htaccess
If the permissions are not already set to 644, then you need to run sudo chmod 644 public/.htaccess.
Step 3: Set the Path to initialize.php
Once you have organized the codebase as you see fit, make sure that the require_once path for initialize.php is correctly set at the top of public/index.php. Otherwise, UF will not be able to find the rest of the code!
Step 4: Create database and setup configuration file
You need to create a database for UserFrosting to work properly. You can do this in phpMyAdmin, cPanel, or whichever tool you prefer/have access to. To specify your database information in the code, find the file userfrosting/config-userfrosting-example.php and rename it to userfrosting/config-userfrosting.php. You will need to set the values of db_host (usually localhost), db_name, db_user, db_pass, and db_prefix (you can leave db_prefix as the default value if you wish).
You may also specify your mail server information, if you have one set up.
/********* DEVELOPMENT SETTINGS *********/
$app->configureMode('dev', function () use ($app, $public_path, $uri_public_root) {
    $app->config([
        'log.enable' => true,
        'debug' => false,
        'base.path'     => __DIR__,
        'templates.path' => __DIR__ . '/templates',     // This will be overridden anyway by the default theme.
        'themes.path'    =>  __DIR__ . '/templates/themes',
        'plugins.path' => __DIR__ . '/plugins',
        'schema.path' =>    __DIR__ . '/schema',
        'locales.path' =>   __DIR__ . '/locale',
        'log.path' =>   __DIR__ . '/log',
        'public.path' => $public_path,
        'js.path' => $public_path . "/js",
        'css.path' => $public_path . "/css",
        'db'            =>  [
            'db_host'  => 'localhost',
            'db_name'  => 'userfrosting',
            'db_user'  => 'admin',
            'db_pass'  => 'password',
            'db_prefix'=> 'uf_'
        ],
        'mail' => 'smtp',
        'smtp'  => [
            'host' => 'mail.example.com',
            'port' => 465,
            'auth' => true,
            'secure' => 'ssl',
            'user' => '[email protected]',
            'pass' => 'password'
        ],
        'uri' => [
            'public' =>    $uri_public_root,
            'js' =>        $uri_public_root . "/js/",
            'css' =>       $uri_public_root . "/css/",
            'favicon' =>   $uri_public_root . "/css/favicon.ico",
            'image' =>     $uri_public_root . "/images/"
        ],
        'user_id_guest'  => 0,
        'user_id_master' => 1
    ]);
});

...
If you frequently deploy and modify your code, you may wish to set up separate development and production configurations. You will notice that immediately below this block of code is a nearly identical block, except that instead of $app->configureMode('dev' ... it says $app->configureMode('production' .... You can then easily switch between these two modes on line 12:
$app = new \Slim\Slim([
    'view' => new \Slim\Views\Twig(),
    'mode' => 'dev'   // Set to 'dev' or 'production'
]);
Step 5: Create Master Account
Navigate to the public directory (e.g. http://localhost/userfrosting/public/). The installer should automatically create the database tables. If everything works correctly, you should see this screen:
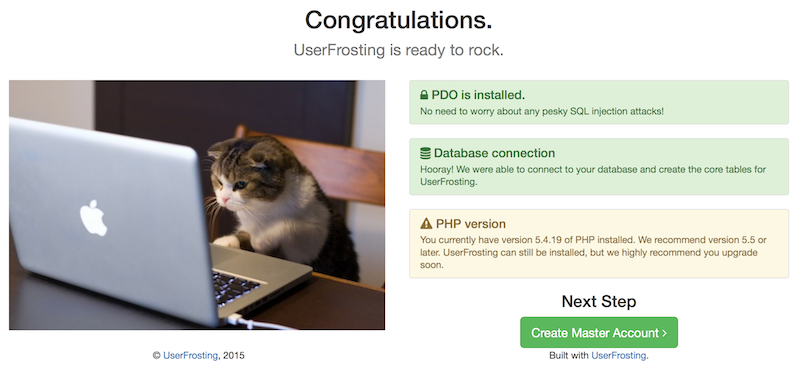
After you press "Create Master Account", UserFrosting will ask you to create the master account. The configuration token is a hash located in the uf_configuration table, under the value for config_token. This is to prevent someone else from registering the master account if you stop in the middle of an installation on a live server (which you should never do anyway!) Choose a strong password for the master account if you are deploying production-level code. The master user will have unrestricted permissions on your UserFrosting site.
Go ahead and login as the master account and you should be taken to the Site Settings page, where you can set some basic configuration parameters.
Troubleshooting Installation
If you are having problems during installation, please see the troubleshooting guide.